If you want to feature some unique section on your website, such as a blog or online store, make sure to create a subdomain. Installation of the WP and setup of your new subdomain is faster with Hostinger. You see, it’s this comprehensive guide to get things moving!
What is a Subdomain?
Creating a subdomain is the best option if you want to extend your website with another separate part, like a blog or an online store. WordPress installation and subdomain setup take only a couple of minutes with Hostinger. To get started, create a subdomain, and install WordPress on it. Follow the guide we explain to you in the step-by-step process.
Explain what a subdomain is
By extending your main domain, a subdomain lets you build an independent part of your site. For example:
Example.com is the main domain.
The blog.example.com subdomain
This structure is excellent for structuring and hosting many parts of a website, such as blogs, portfolios, or stores.
Step 1: Create a Subdomain on Hostinger
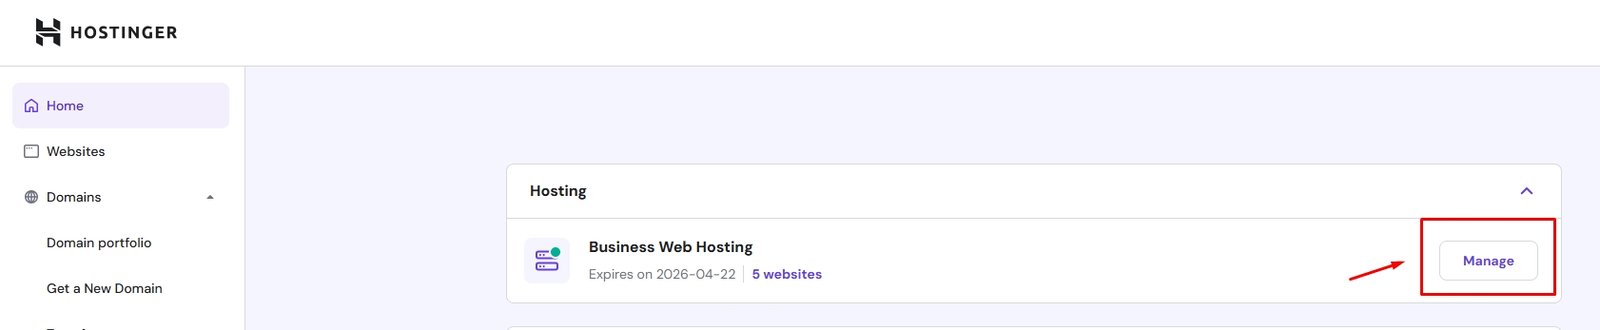
Open your Hostinger account and log in. Access your control panel at Hostinger.

- Select your plan and click on the Manage button.
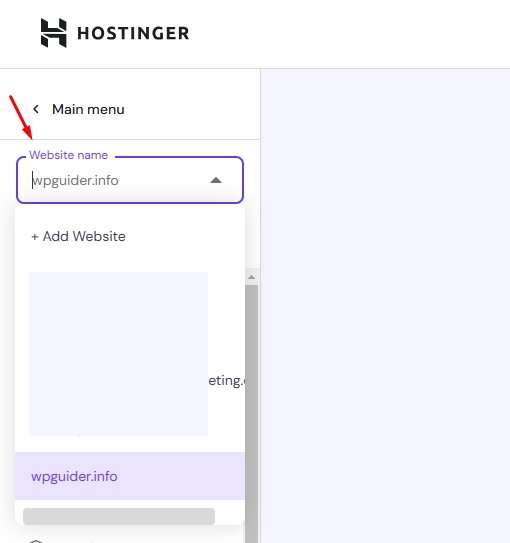
- Select the domain from the dropdown menu for which you want to create a subdomain. If you have multiple domains, choose the one you want, such as "wpguider"
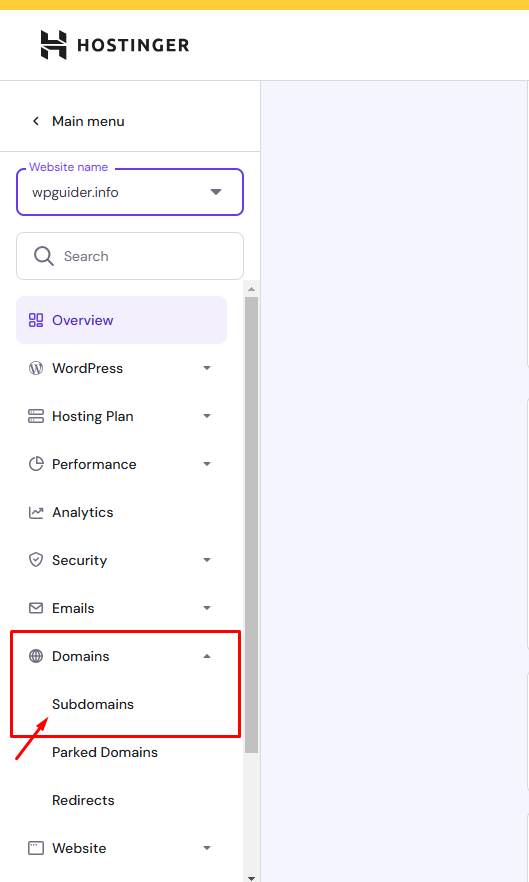
- Once you have selected your domain, click on the Hosting tab.
- Look for the Subdomains option in the dashboard menu.
- Enter the name you want for your subdomain (blog, store, etc.)
- To complete the creation of the subdomain, click on Create.

- Give the subdomain a few minutes to propagate before proceeding to the next step.
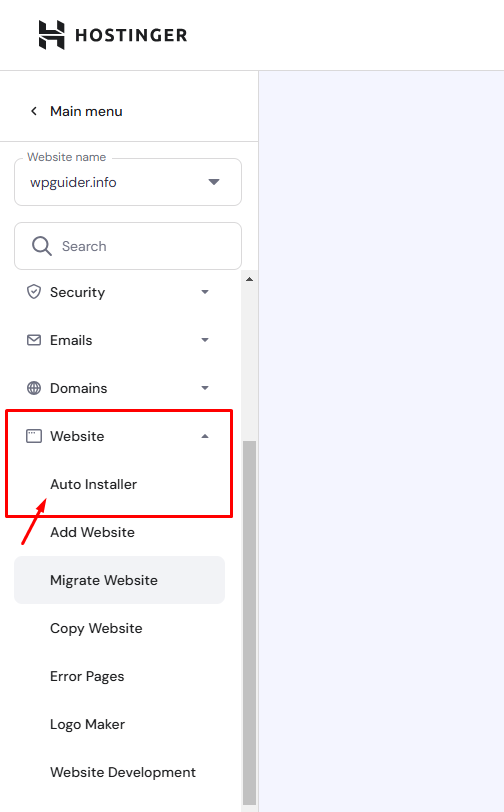
Step 2: Install WordPress on Your Subdomain
- Go to your Hostinger control panel and select Auto Installer.
- To install WordPress quickly, navigate to the Auto Installer option.
- From the list of programs, select WordPress.

- Choose the installation path for your recently formed subdomain (blog.example.com, for example)
- Configure your email address, password, and WordPress admin username.
- Hostinger takes care of database configuration automatically.
- After selecting Install, watch for the procedure to finish.
- When all set just click on the Next button
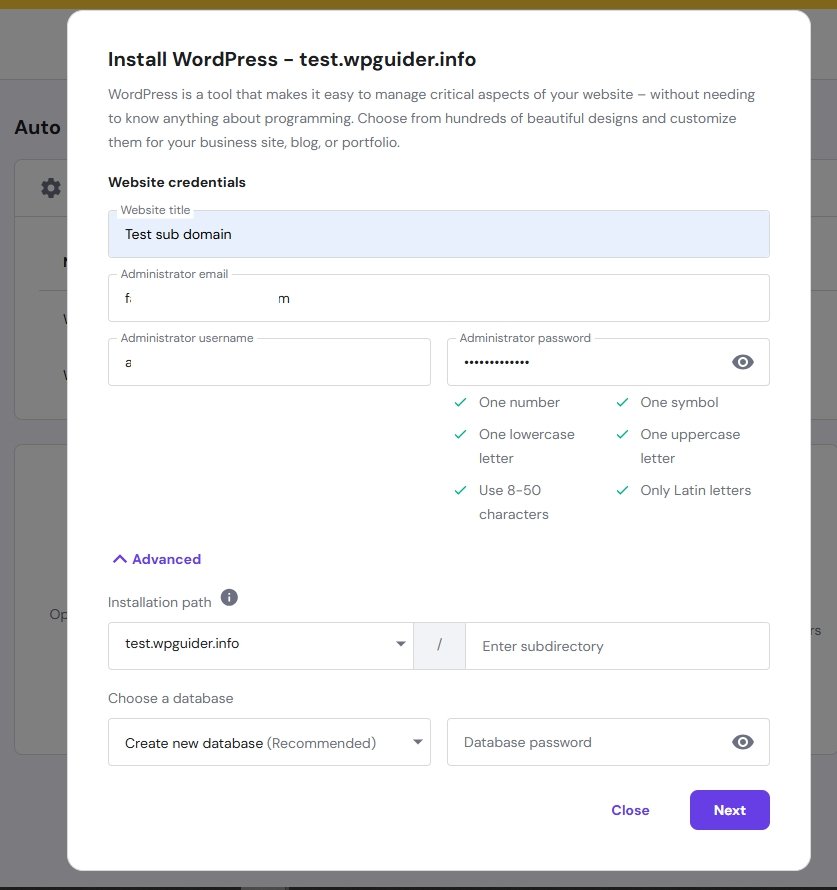
- When it is complete you'll see a success message confirming your WordPress website is set to go.
Conclusions
There is so much room for website growth by setting up a WordPress on Hostinger and creating a subdomain. The process is not complicated to use whether one is building a blog or an online store or building a portfolio.
Start with Hostinger to create a subdomain now and be able to realize the fullest potential of your internet presence!